Setting up custom events and conversions (goals in Universal Analytics) in GA4 is a different process than what we’re used to in Universal Analytics however it’s not particularly complicated. In this guide, we take you through how to set up destination events and conversions such as thank you pages, interaction events and conversions such as video views and link clicks.
Setting Up Destination Events in GA4
Step 1: The Configure section
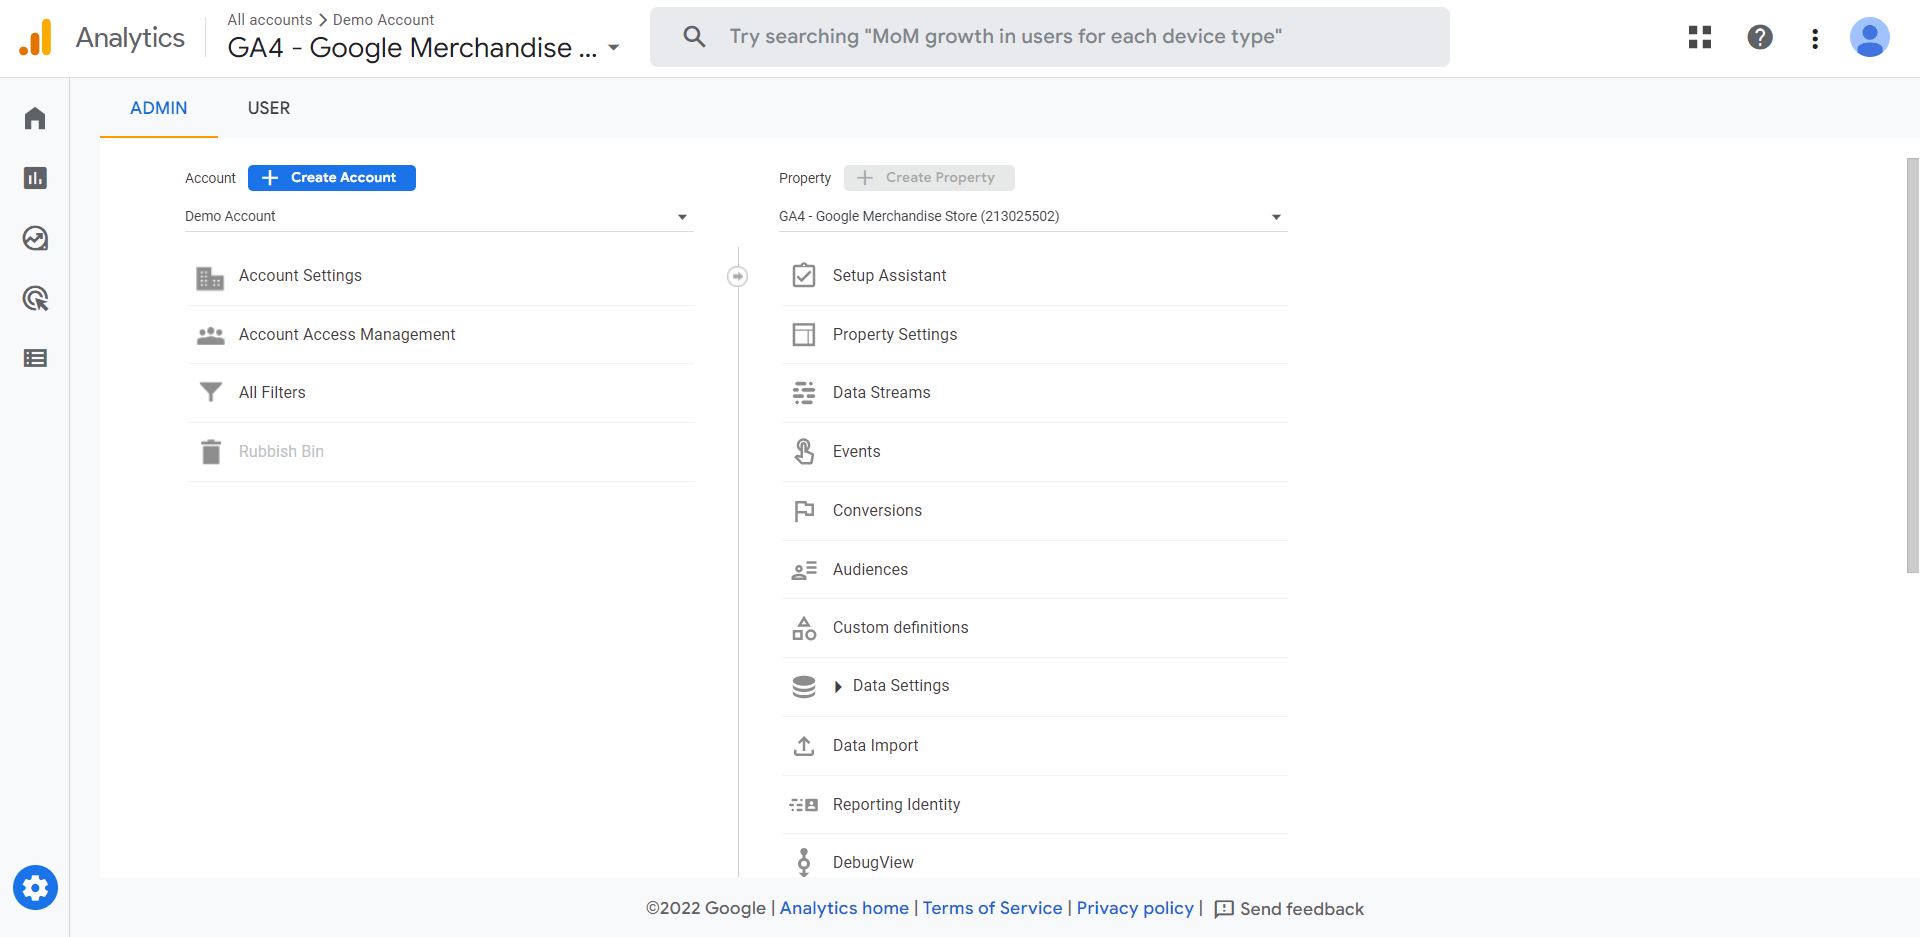
Head to the “Admin” section within GA4. This is where we can set up our custom events and conversions.
Step 2: Creating a new event
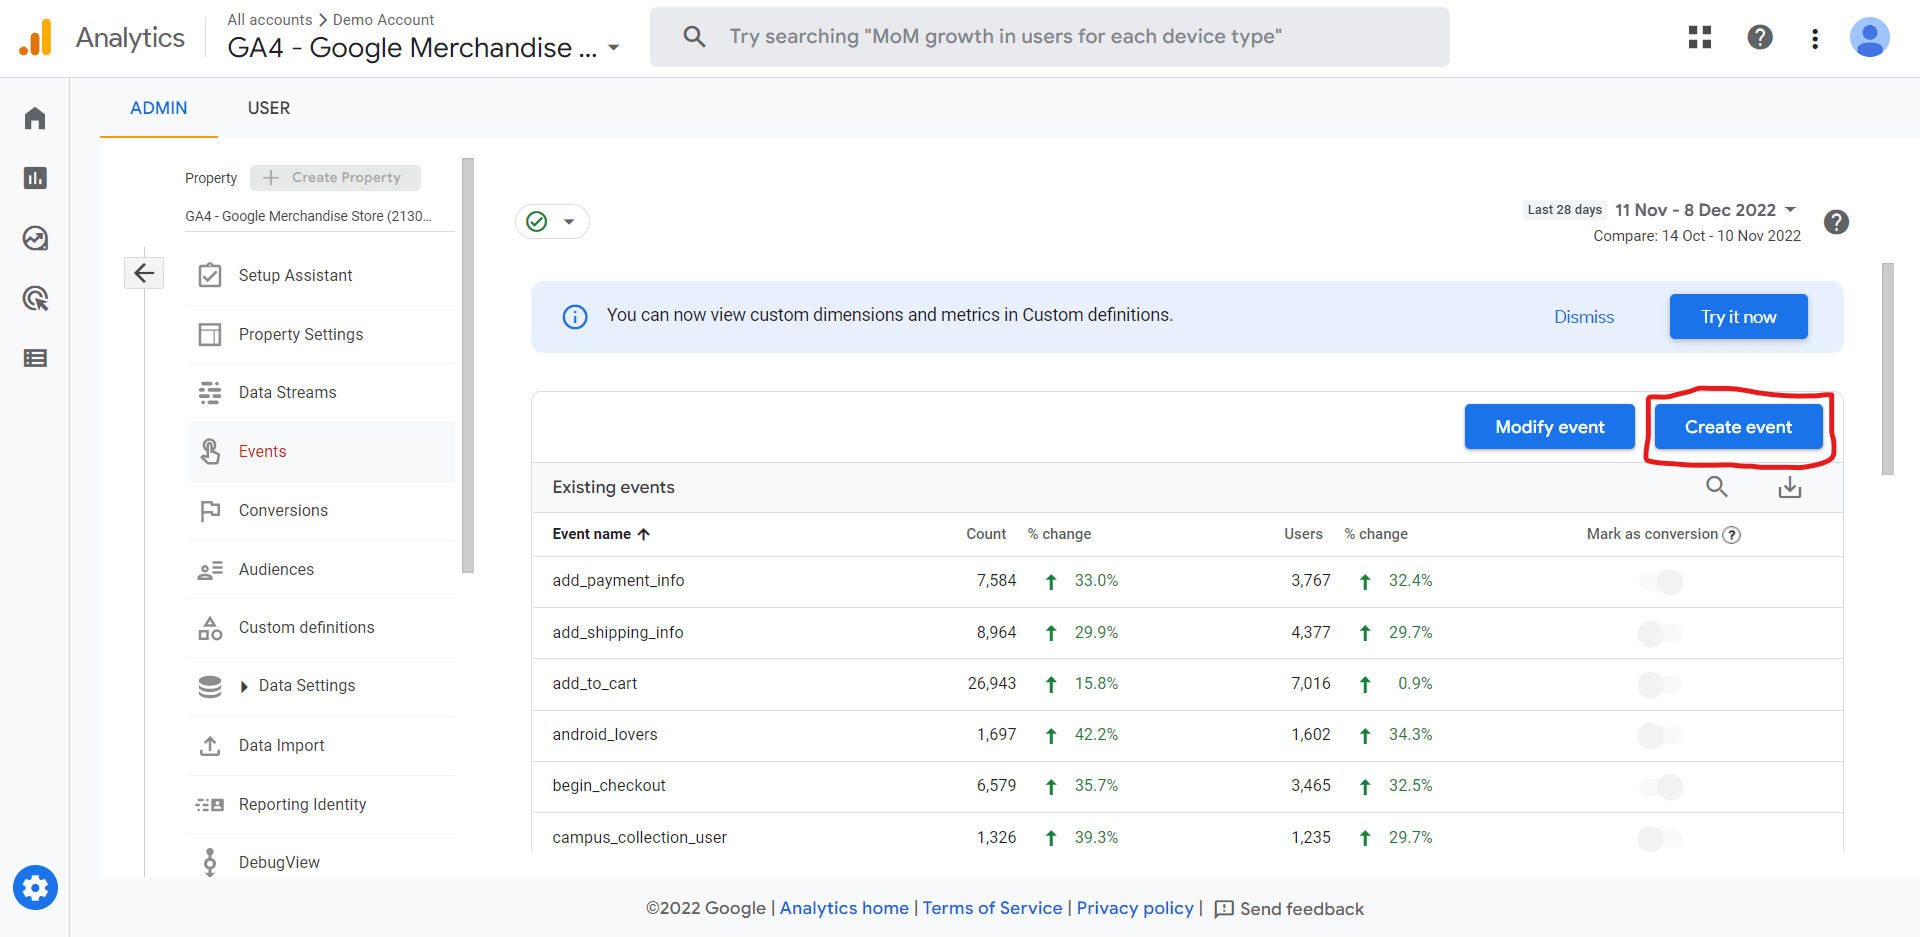
To create a new event click on the “Events” menu item in the property column. You can then create a new event by clicking on the “Create event” button
Step 3 – Your custom events
On the next screen which lists your custom events (this will be empty if you’re setting this up for the first time), there is another button called “Create”, click this to start setting up the event.

Step 4: Set up the event parameters
After clicking the “Create” button you will be presented with a range of options to set up your event. To set up a destination event you will first need to give your event a name such as “email_click”. We find it easiest to use underscores instead of spaces when working with GA4. Next, you will need to add the conditions to trigger this event, as it’s a destination event we need to select:
event_name equals page_view
AND
page_location equals [the URL string after your domain name] eg /thank-you/
Then click on the “Create” button at the top of the page.

Setting Up Interaction Events in GA4
There are two different ways to set up interaction events in GA4 however both require Google Tag Manager or custom code. We will show you our preferred way of adding interaction events via Tag Manager.
Step 1: Go to Tag Manager
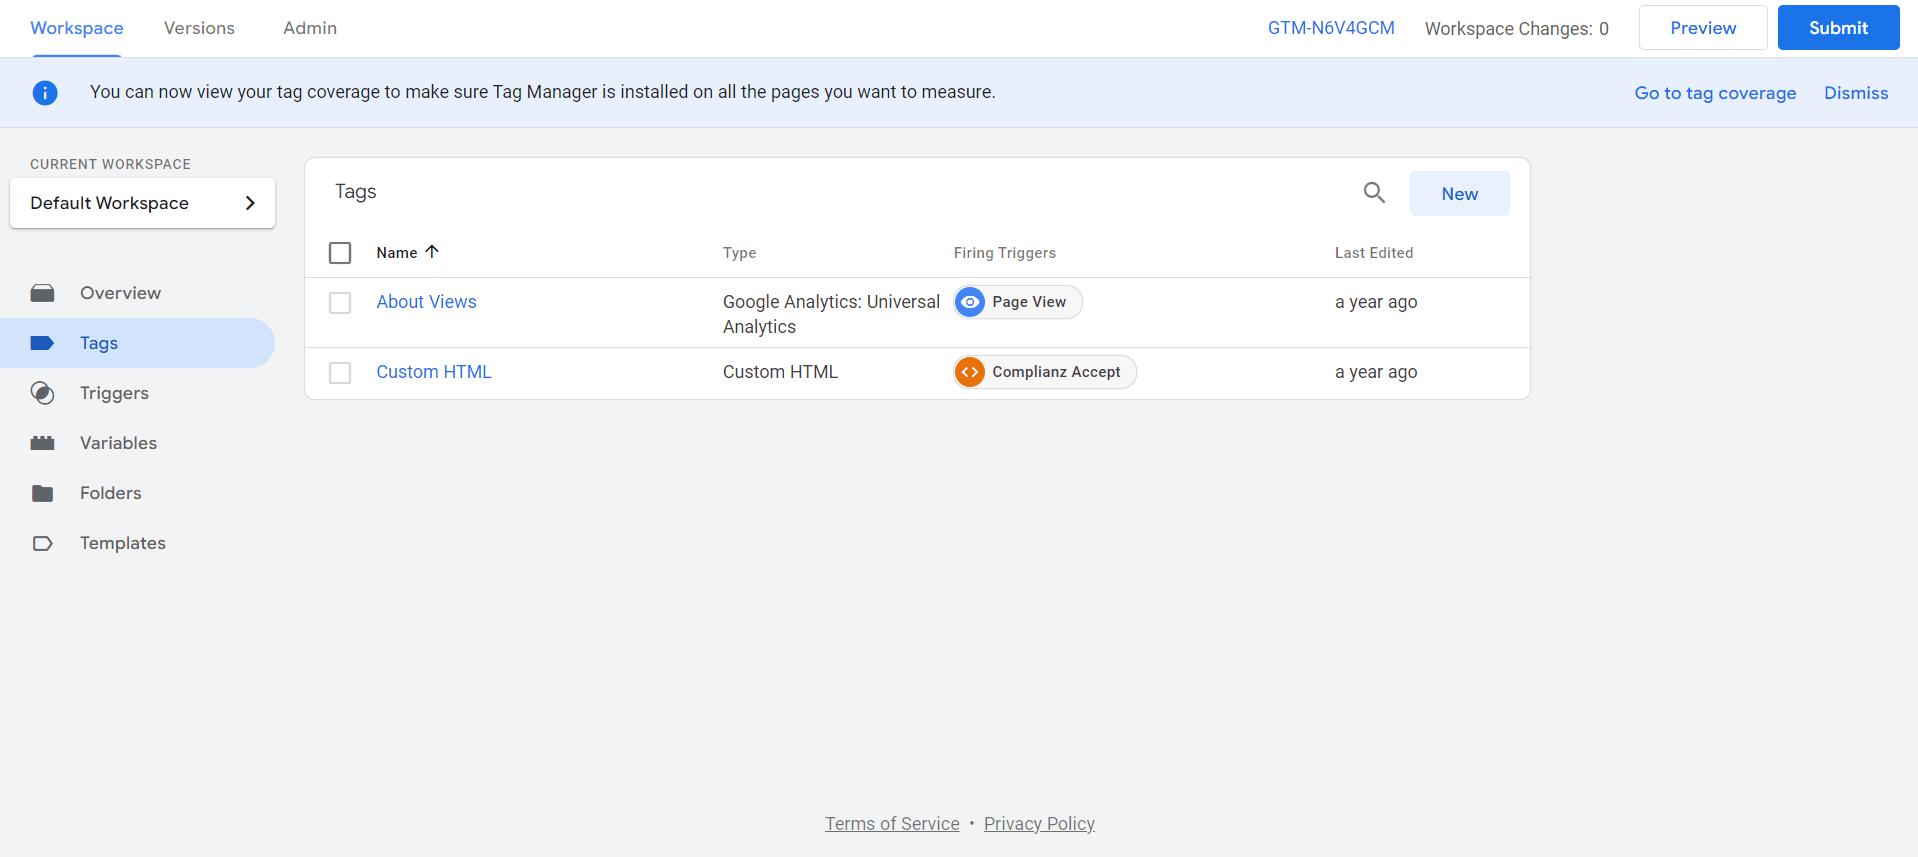
Go to the Google Tag Manager account for your website. Depending on your Tag Manager account you may already have a few tags, in our dummy account, we have two tags already set up.
Step 2: Create a new tag
Click on the “New” button to create a new tag which will pull up a range of tags you can create.

Step 3: Select GA4 Event tag
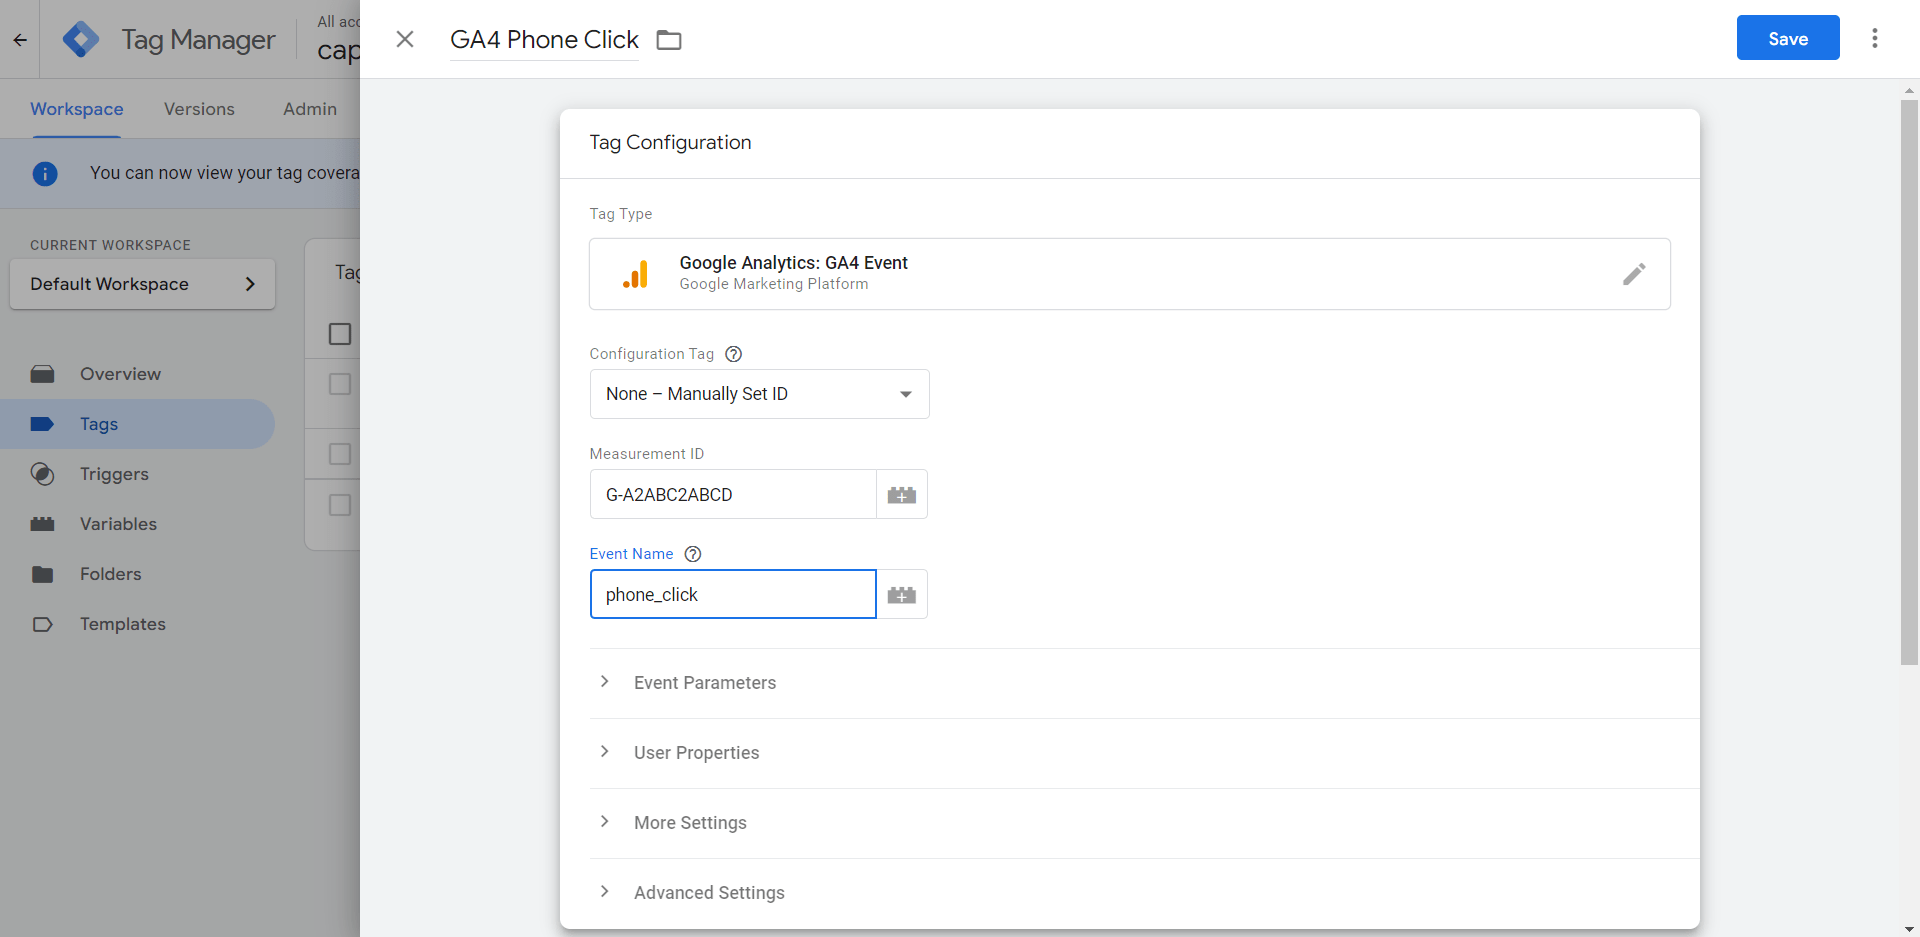
Give your tag a name and then click on the “Tag Configuration” to start setting up your tag. This will bring up the list of tags to choose from, for this guide you want to select “Google Analytics: GA4 Event” from the list.

Step 4: Set the measurement ID
Once you’ve clicked on the tag it’s time to set up the tag configuration. If you’ve set up GA4 via Tag Manager you can select your existing GA4 tag, if you’ve set it up another way you can manually set your measurement ID (G-A2ABC2ABCD). The next step is to add a name for your new event, this will be the event name shown in GA4.
Step 5: Configure the trigger
After that, you need to set up a trigger for your new tag. In our case, that’s any link clicks with “tel:” in it.

Step 6: Publish Tag Manager workspace
Once both the tag and trigger have been saved and the new version of your Tag Manager account has been submitted and is live you should start to see the events appear in your GA4 account. You can use the “ViewDebug” method further along in this guide to make sure your events are firing correctly.
Setting Up Conversions In GA4
Setting up a conversion in GA4 is relatively simple once you’ve got your events set up and working!
Step 1: Head to the admin menu
To mark your new custom event as a conversion in GA4 you will need to make a note of the name of the event you just created. In our example, this was email_click or phone_click. Once you’ve made a note you can then head to the conversions section on the GA4 admin menu, below the events tab we were just on.
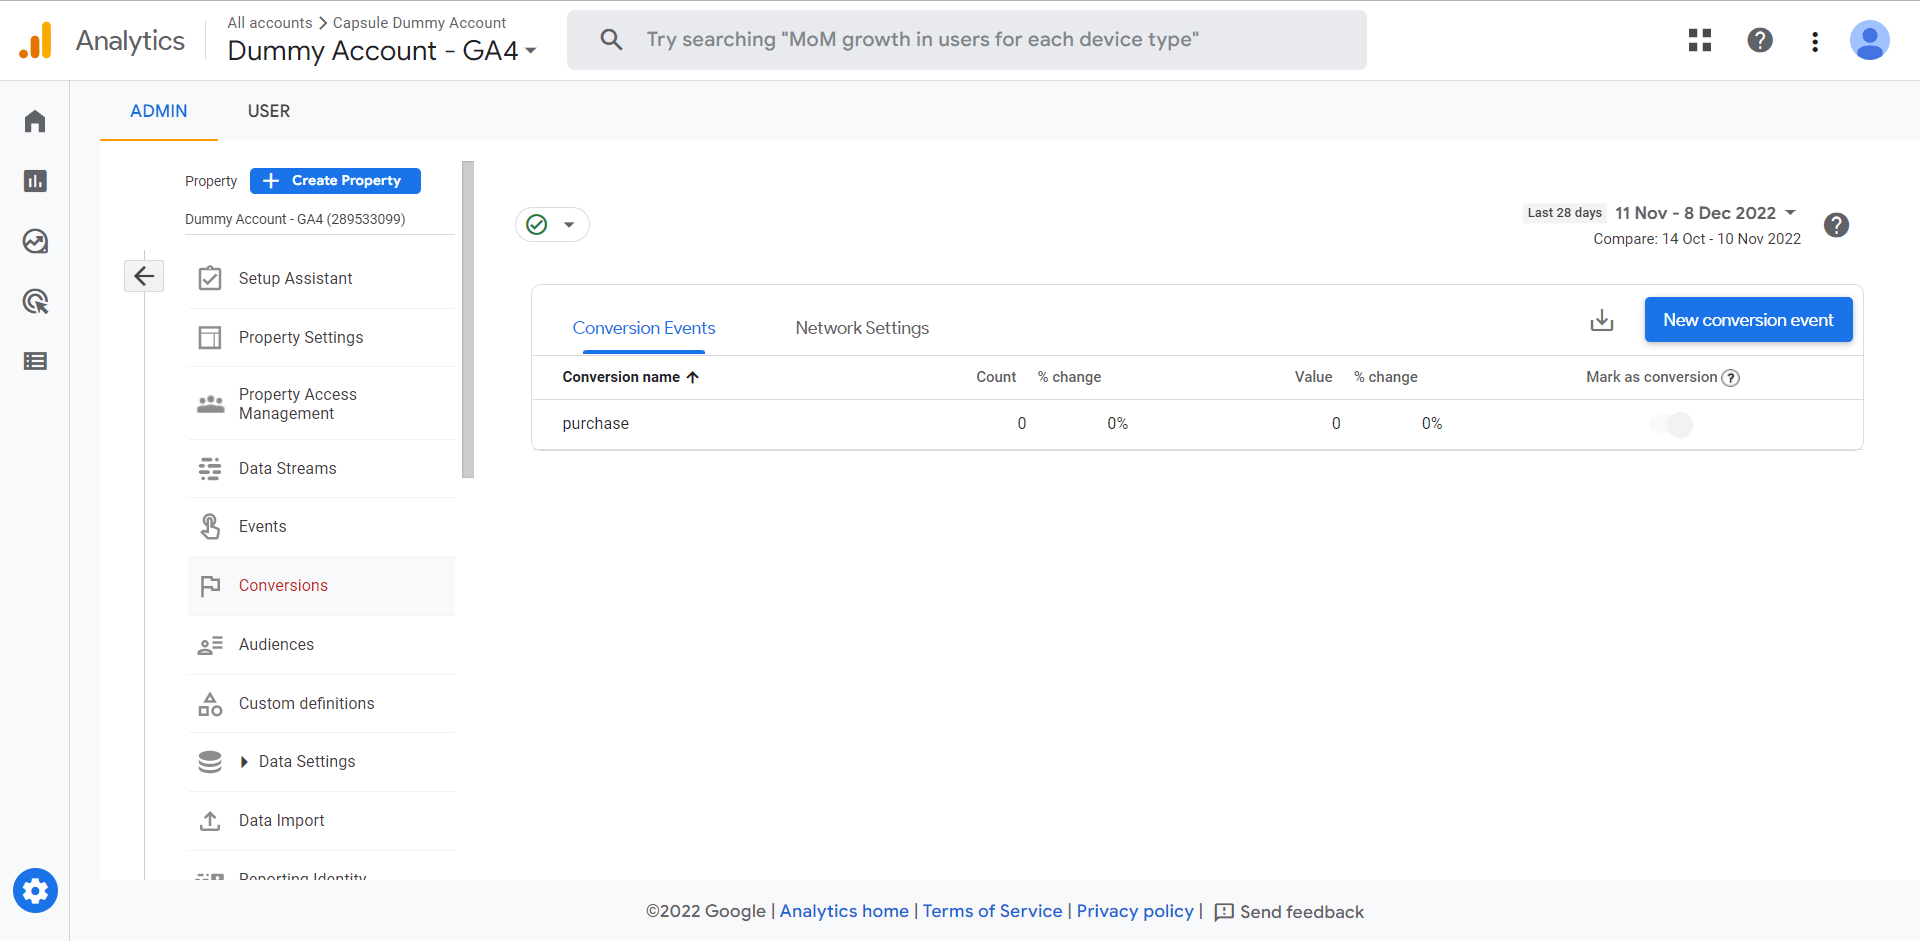
In our new, dummy account we can see there is already a conversion called “purchase” that hasn’t been activated yet.
To add your new event as a conversion you will need to click the “New conversion event” button at the top right of the page.
Step 2: Add event name
When you click the button a pop-up will appear where you can add an event name, this is where you want to add the name of the event you’ve just created, in our case “email_click” or “phone_click”. Then click the “Save” button.

Step 3: Debug events and conversions (optional)
If you want to make sure you’ve set up your event correctly and it’s triggering correctly you can head to the “DebugView” menu item in the admin menu. You will need to add the Google Analytics Debugger Chrome extension to do this or alternatively, you can edit the tag on your website to put it into debug mode.
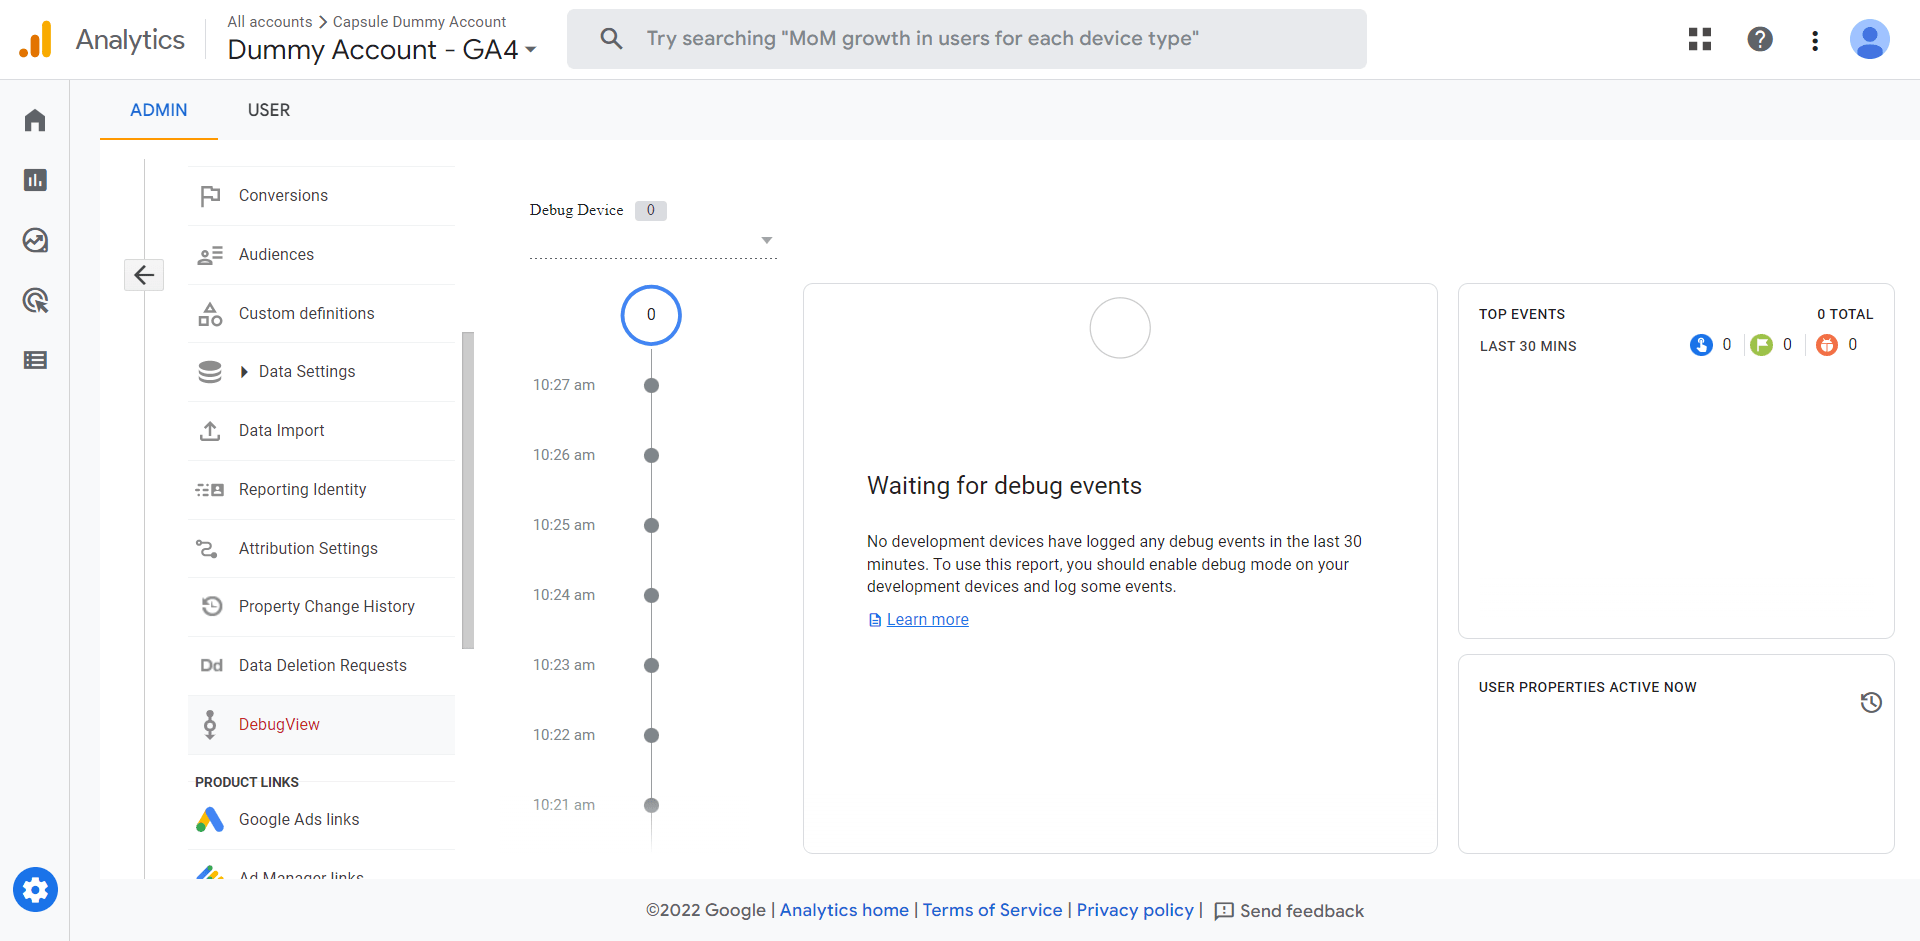
Once you enter debug mode you should start to see the different events start to appear and when you trigger your conversion event it should come up in green with a little flag icon.

Time To Set Up Those Events
Now you’ve learnt how to set up events, create conversions and test out the tracking to make sure everything works as expected it’s time to get these set up in your GA4 account! If you’re struggling to get to grips with GA4 you can take a look at some of our other guides including:
– How to access the referral report
– How to find conversions rates
– Recreating the organic landing page report
If you’re still stuck and need some support in making sure your analytics is set up correctly and tracking everything important then get in contact with our digital marketing team.